Working with a slow computer may be pretty frustrating, whether it comes gradually over time or suddenly. Even if you keep your laptop or PC in good working order, it’s astonishing how rapidly things slow down. This post is for you if you’re running Windows 10, 8, or 7, and you’re wondering why your laptop is so slow. You don’t have to give up your computer just yet, thankfully. In truth, there are various things you may do to improve its performance. Even the slowest computer can be brought back to life with some easy tidying and a few more complex operations.
This article will show you a few ways to speed up a slow laptop or computer running Windows 10, 8, or 7. We’ll be concentrating on system performance concerns rather than network issues in this article. We’re using Windows 10, so the guidelines and screenshots will be from that version. If there are any changes for Windows 11, 8, or 7, they will be indicated directly below.
Update Windows, drivers, and apps
You’ve probably heard that updating your software is important for security. This is correct, and it can also aid with performance. When an update is available, Windows will give you an automatic notification. All you have to do now is make sure you don’t put it off any longer.
You can always check if you suspect you’ve missed an update. Select Settings or the settings icon from the Start menu. Then click to Windows Updates > Updates & Security.

Drivers and software, in addition to the Windows operating system, should be kept up to date. This is beneficial for both security and performance. If you suspect you’ve missed an update, a short online search should reveal the version you should be using.
Stop startup programs
Other apps that automatically run on startup, including those in the tray, can slow down your computer. Some, such as antivirus software, you may wish to run, but others may be unneeded.
Right-click the taskbar and select Task Manager or hit Ctrl-Shift-Escape to launch. Head to the Startup tab and you’ll be able to view each item that runs on startup, along with its impact.

Examine these and determine which ones do not require automatic start. If you can disable some of the high-impact ones, this approach is extremely useful to performance. However, several of these programs are required for Windows to function. For example, those having Microsoft as the publisher should generally be ignored. If you’re unsure, either leave it alone or conduct a Google search to learn more.
To disable, simply right-click and hit Disable. Remember, you’re not disabling the program, just the fact that it runs on startup.
Windows 7: Instead of accessing Task Manager, you’ll need to search for System Configuration.
Close system tray programs
If your computer is slow to boot, it’s conceivable that you’re running too many programs at the same time as Windows. Items in the system tray frequently start up with your computer and then stay on while you use it.
To access these items, click the upwards arrow toward the right side of your taskbar.

If there are any programs you don’t need to have running, right-click them and close them.
Find programs that eat up resources
If you notice that your computer is suddenly running much slower, a certain program is likely at a fault. Going into your task management and seeing what’s taking up your resources is one way to locate the issue.
Right-click the taskbar and select Task Manager. Click More details to find out information about the programs that are currently running on your computer. It should show you the Processes tab by default.

You can click each header to sort the list according to which applications are using the most of that particular resource. If you need to close something, try closing the actual application first. If it won’t close, come back to the
Task Manager screen, right-click the application and hit End task.
Windows 7: Instead of accessing Task Manager, you’ll need to search for System Configuration.
Delete unnecessary files
Our computers, like our closets and drawers, become cluttered. You know it’s there, even if you can’t see it, and it could be affecting the functionality of your computer. This is especially true if you work with a lot of huge files daily, such as high-resolution photographs, audio files, and films.
Make it a practice to delete files and folders once a week and clear the recycle bin afterward to free up space. If you do this regularly, you’ll be less worried about accidentally deleting something vital because you’ll remember exactly what’s in the files and folders.
Adjust your power options
Windows includes several pre-configured ‘power plans’ to fit your needs. Balanced is the default setting, which considers both performance and energy consumption. However, the latter is only a worry if you’re running on batteries or attempting to save money on energy. As a result, you may wish to reconsider your strategy.
If your computer is running slowly, the High-Performance plan is a better option. Although this option consumes more energy, it prioritizes performance and should make your system run faster.
Aside from the standard options, you could choose to create your own custom plan. Go to Control Panel > Hardware and Sound > Power Options > Create a power plan. Choose which existing plan you would like to start with, enter a name for your new plan, and select Next.
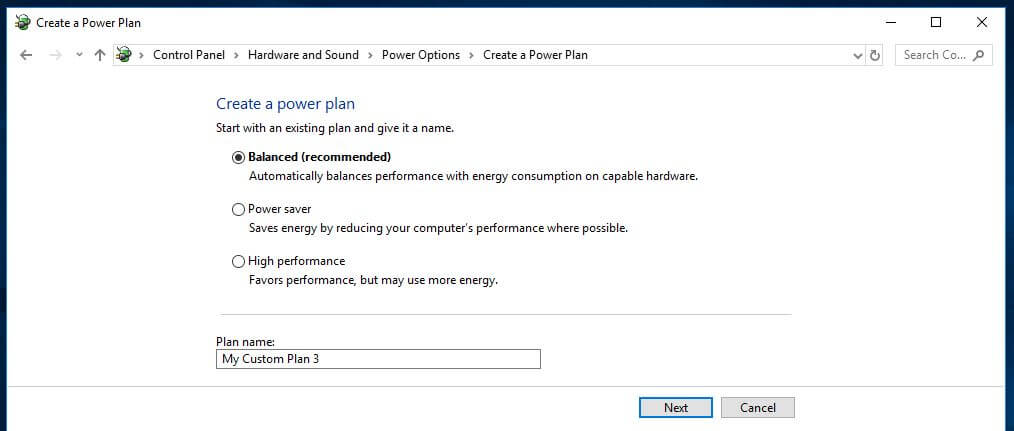
Basic options include how long the display stays on when you’re inactive and how long before the computer goes into sleep mode. These won’t really affect your computer’s speed, but if you go into Change advanced power settings, you can make more adjustments that will have an impact.
Uninstall programs you don’t use
We frequently install large apps without realizing how much disk space they consume. If you suspect this is the case, simply uninstall any programs you don’t use. Even if you only use a program once in a while, if it’s very huge, it can be worth simply reinstalling each time you need it.
To uninstall a program, head over to Control Panel > Programs > Programs and Features.
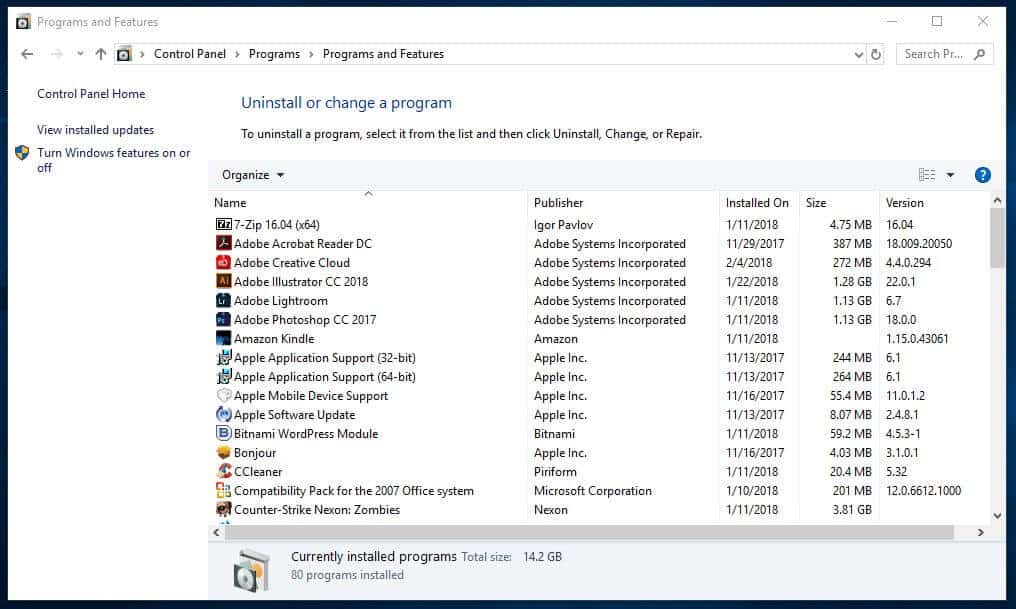
Go through the programs and decide which ones, if any, you don’t need. If you’re unsure about a particular program, you could simply use a search engine to find out more.
Run a disk cleanup
Windows comes with a built-in tool for cleaning up junk that accumulates over time.
To access the Disk Cleanup tool, go to Control Panel > System and Security > Administrative Tools, and select Disk Cleanup from the list.
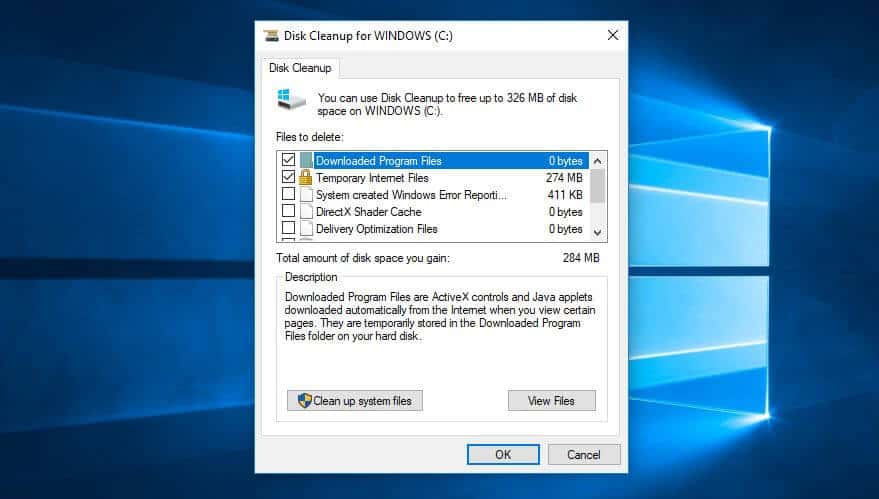
Here, you can select the types of files you want to get rid of and click OK. Then click Clean up system files and choose any system files you want to remove.
Turn Windows features on or off
While you’re in the Programs and Features screen, you might want to check to see if there are any Windows components you don’t need. Click Turn Windows features on or off and you’ll see a list of these components.
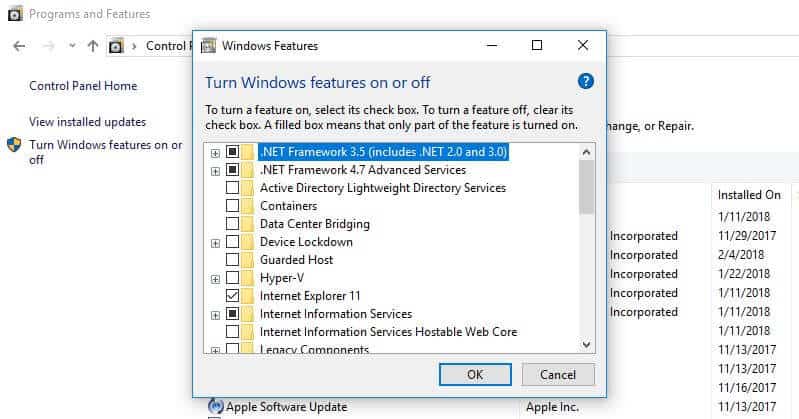
Be careful not to turn off anything you actually need. So again, a search for anything you’re unsure about is a good idea.
Check for malware
Malware (harmful software) is a general term that refers to malicious software that can harm your computer. These can come from a variety of places, such as email links, software downloads, and even advertisements. Malware can slow down your computer, in addition to potentially causing lasting damage to your system.
Installing effective antivirus software can help protect you from malware and other threats.
Defragment your hard drive
Over time, files on your hard drive become fragmented. As your computer now has to check in multiple places for the pieces, it can run more slowly. The term ‘defragment’ sounds a little dramatic, but it basically means putting those files back together so your system can run more efficiently.
In fact, it’s something that Windows 10, 8, and 7 do automatically on a set schedule. The default schedule is once per week, but you can go in and manually run it if you suspect there’s an issue.
First, it’s important to note that you only need to do this if your computer uses a traditional mechanical Hard Disk Drive (HDD).
Go to My Computer and right-click the hard drive (by default named WINDOWS (C:) (though you may have renamed it). Then go to Properties > Tools and under Optimize and defragment the drive, click Optimize.
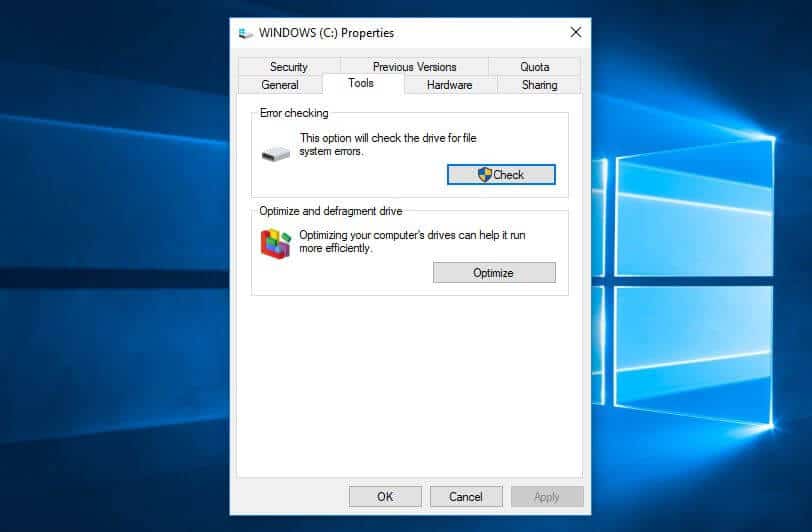
You’ll then get an Optimize Drives screen popup.
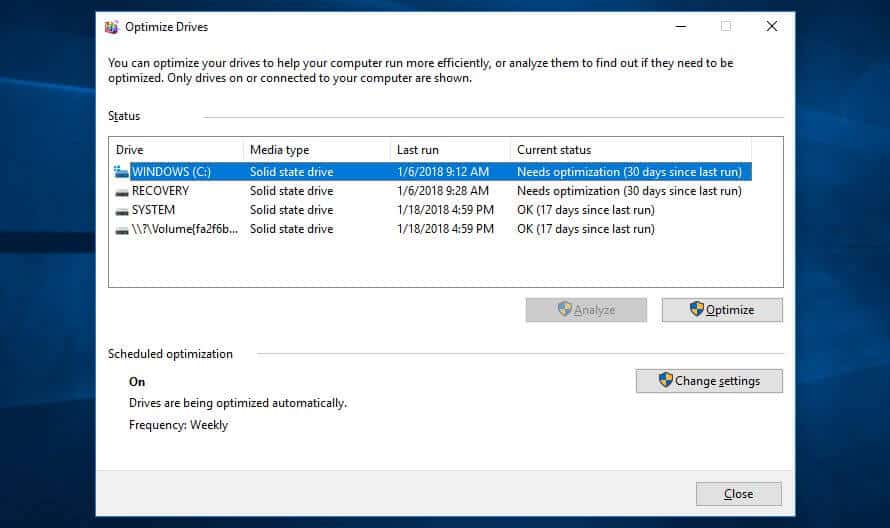
Select an HDD drive and click Analyze to see how fragmented it is. A good rule of thumb would be to keep it below five percent. If it’s above, you can click Optimize to defragment the disk.
Windows 7: Look for Disk Defragmenter using the search bar and select an HDD under Current status.
Adjust graphics, themes, and animations
Recent Windows versions have a lot of graphics, including animations like fading effects and flyouts. These improve the overall user experience by making the program appear more sleek and sophisticated. On the other hand, they can cause your computer to slow down.
It’s simple to adjust these settings and hopefully save a little processing power. Go to Control Panel > System and Security > System > Advanced system settings. Then, in the Performance section, hit Settings and you’ll have a full list of options.
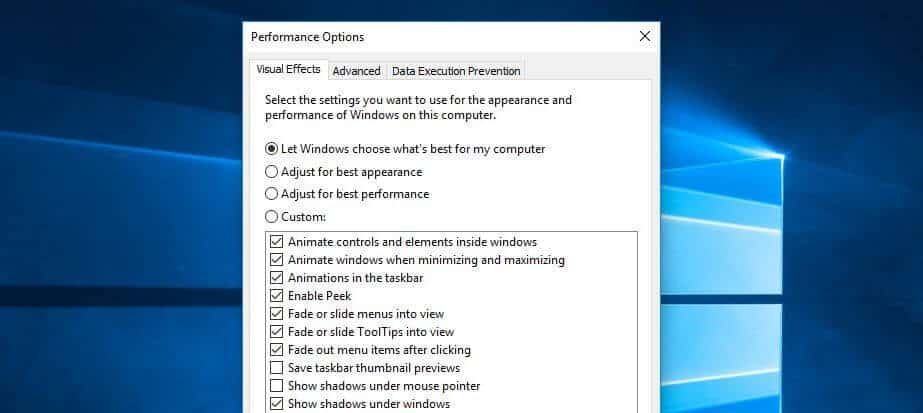
You can select Adjust for best performance (this will remove all visual effects) or opt to remove some individually. It’s a matter of preference, but fade and shadow features are some you could probably live without.
Windows 7: Search for Performance Information and Tools, select Adjust visual effects, and use the Visual Effects tab.
Happy Learning …

